






Why Refrigeration Equipment Loses Efficiency and How to Fix Common Causes
Start with the symptoms, not the assumption
When Refrigeration Equipment begins drawing more power, cooling unevenly, or taking too long to pull a room down to temperature, many operators jump straight to “the compressor is failing.” In day-to-day use, that is often the wrong starting point. More often, efficiency drops because airflow is restricted, heat transfer surfaces are dirty, frost is not being cleared properly, or the room itself is working against the system. If you check those items in the right order, you can usually find the cause faster and avoid unnecessary parts replacement.
A practical rule: begin with what has changed recently. New loading habits, longer door-open time, warmer incoming product, blocked air paths, cleaning delays, and defrost issues are common triggers. They affect performance long before a major component actually fails.
Check the evaporator side first
If the evaporator cannot absorb heat efficiently, the whole system suffers. This is usually where operators find the first real clue.
- Look for frost pattern problems. A light, even frost pattern can be normal in low-temperature operation. Thick ice buildup, heavy frost on one section only, or ice around the drain pan points to airflow or defrost trouble. If frost returns quickly after defrost, the problem is not solved yet.
- Inspect fins and coil surface. Dust, grease, packaging fibers, and damp dirt act like insulation. Even a coil that “doesn’t look too bad” can lose meaningful heat transfer. Clean gently with a method suitable for fin surfaces; bent fins and aggressive cleaning create a second problem.
- Listen to the fan, don’t just see it spinning. A fan can rotate and still move too little air because of blade damage, motor weakness, icing, or obstruction. Weak throw means the room temperature may look acceptable near the unit but drift badly farther away.
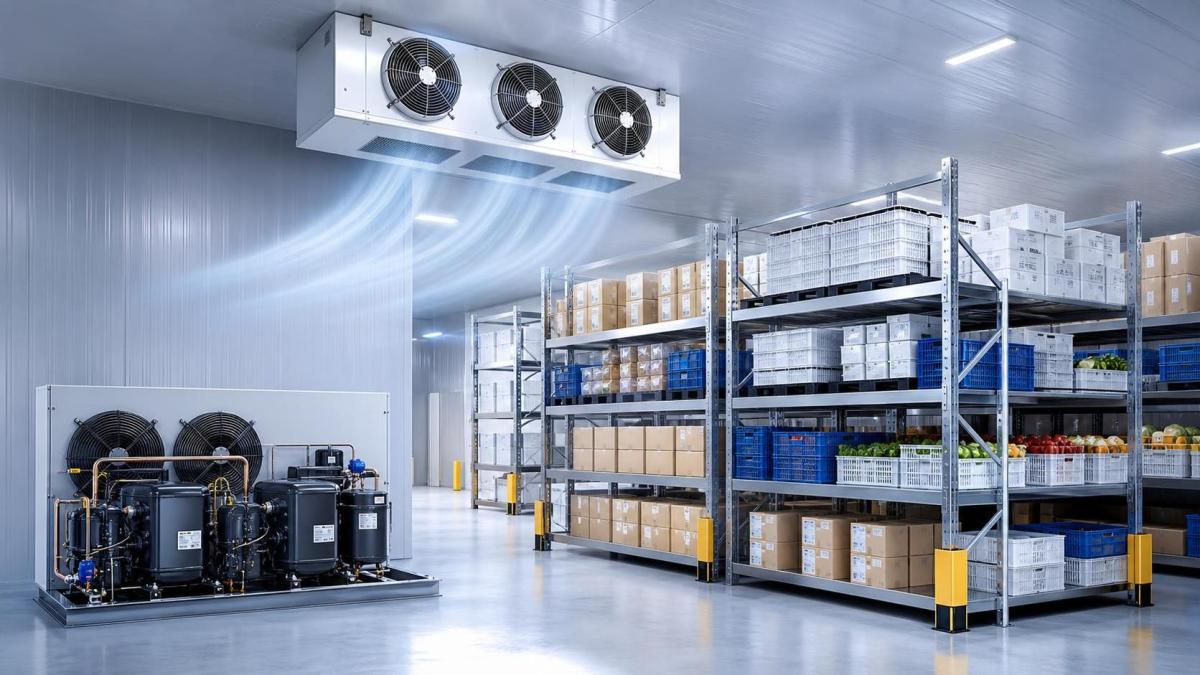
This is also where equipment selection matters. For example, in applications where frost load and air distribution matter, coil spacing and defrost design directly affect how long efficiency can be maintained between service intervals. A model such as Commercial Ceiling-Mounted Evaporator 401D uses different fin spacing options and a stainless steel electric defrost arrangement, which is useful when operating conditions vary between chilled and frozen storage. That does not remove the need for inspection, but it does change how quickly performance falls off in real use.
Do not ignore airflow around the room
A refrigeration system can be mechanically sound and still perform poorly because air cannot circulate. This is especially common in cold rooms and commercial storage spaces.
Check whether product is stacked too close to the air outlet, pushed tight against the wall, or loaded above the intended line. Short-circuited airflow is a classic reason for “the unit runs all day but some zones stay warm.” Operators often read one acceptable temperature point and miss the fact that return air is not representative of the whole room.
A quick field check helps: compare temperature near the air off-take, at mid-room, and close to the door after stable operation. Large spread usually means an airflow or loading issue before it means a refrigeration capacity issue.
Review the defrost cycle like an operator, not a programmer
Defrost settings that look reasonable on paper often fail in actual operating conditions. Too little defrost leaves ice on the coil. Too much defrost wastes energy and can raise room temperature enough to create product risk.
What to verify:
- How many defrost cycles are scheduled in 24 hours.
- Whether heaters are actually energizing.
- Whether the drain pan and drain line clear water completely.
- Whether the coil leaves defrost clean or still carries ice in corners and at the bottom.
One common mistake is extending defrost time when the real issue is poor heat distribution across the coil or a blocked drain. Another is reducing defrost frequency just to cut power use; that usually pushes the system into a much less efficient operating state.
Check the condenser before blaming refrigerant
On the high side of the system, condenser fouling is one of the most frequent causes of rising power consumption. Dirty condenser surfaces force the compressor to work against higher condensing pressure. The effect is simple: more energy in, less useful cooling out.
Inspect for dust, lint, grease film, blocked louvers, recirculated hot air, or poor ventilation around the condensing unit. In machine rooms and back-of-house spaces, this problem builds gradually, so operators adapt to it and stop noticing. If discharge air feels abnormally hot and the unit runs longer during loads it used to handle comfortably, the condenser deserves attention immediately.
Pay attention to doors, seals, and infiltration load
A lot of efficiency loss comes from outside the refrigeration circuit. Damaged door gaskets, doors that do not self-close, frequent traffic, and gaps around frames all bring in heat and moisture. The moisture side matters just as much as the temperature side, because every bit of extra humidity becomes frost load later.
Signs are usually obvious once you look for them: condensation near the doorway, frost close to entry points, longer recovery after loading, and more frequent defrost need. If these are present, replacing a component inside the system may change nothing.
Separate control problems from capacity problems
Bad readings create bad decisions. Before concluding that Refrigeration Equipment lacks capacity, verify the temperature sensor location, controller setpoint, differential, and calibration condition. A sensor placed in a poor air path can make the system cycle at the wrong time. An oversized differential may hide temperature swings. A sensor coated with ice or installed too close to an outlet can give a false sense of stability.
When equipment sizing and component design are part of the problem
Sometimes the system is maintained reasonably well, but the installed evaporator or airflow design does not match the room’s real operating pattern. That shows up in spaces with warm product pull-down, frequent door openings, or frost-heavy low-temperature use. In those cases, details such as air volume, throw distance, fin spacing, drain pan heating, and coil circuit design matter more than operators expect.
For instance, a ceiling-mounted unit built with grooved copper tubes, aluminum fins, and multiple fin spacing options is easier to match to different room temperatures and frosting conditions than a one-spec-fits-all approach. The Commercial Ceiling-Mounted Evaporator 401D is one example of that type of configuration: its listed performance changes across 0°C, -18°C, and -25°C conditions, which is exactly why operators should compare the actual room duty to the rated operating condition instead of looking at one cooling capacity figure in isolation.
A workable inspection order for daily users
If you need a simple sequence that works in the field, use this:
- Confirm the complaint: longer runtime, high power use, warm spots, or icing.
- Check door use, seals, and recent loading changes.
- Inspect evaporator frost, coil cleanliness, fan airflow, and drain condition.
- Review defrost frequency and whether the heaters are actually doing the job.
- Inspect condenser cleanliness and surrounding ventilation.
- Verify controller settings and sensor position before escalating to deeper system diagnosis.
That order saves time because it deals with the failures operators see most often, and it keeps you from treating symptoms as if they were compressor or refrigerant problems. In practice, Refrigeration Equipment usually loses efficiency by inches, not all at once. Catch those inches early and the fix is smaller, cheaper, and far less disruptive.
CHAIDONG
Professional generator set manufacturer
24/7 before-sales and after-sales services
Comprehensive technical support